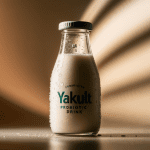
Experience the refreshing tang and health benefits of vegan kefir with this simple recipe! Originating from traditional fermented dairy drinks, kefir has been enjoyed for centuries due to its probiotic content and unique, slightly sour flavor. This vegan version uses plant-based milk, making it perfect for those looking to enjoy a dairy-free, gut-friendly drink. With minimal ingredients and easy steps, you’ll have a delicious, tangy vegan kefir that’s rich in probiotics and perfect for sipping, adding to smoothies, or even using in recipes that call for a touch of creaminess!
Here’s a simple recipe for making Vegan Kefir using plant-based milk. This recipe is easy to follow and will yield a delicious, tangy drink rich in probiotics.
Homemade Vegan Kefir Recipe
Ingredients
- Base Ingredients:
- 4 cups unsweetened plant-based milk (such as soy, almond, or coconut milk)
- Probiotic Starter:
- 1 tablespoon kefir grains or 2 packets of vegan kefir starter culture
Instructions
- Prepare the Milk:
- In a saucepan, gently heat the plant-based milk until it is warm (around 100°F or 38°C). Do not let it boil.
- Add Probiotics:
- If using kefir grains, add them directly to the warm milk. If using a powdered starter culture, sprinkle it over the milk and stir gently to combine.
- Fermentation:
- Pour the mixture into a clean glass jar or container, leaving some space at the top for expansion. Cover the jar with a cheesecloth or a loose lid to allow airflow while preventing contaminants from entering.
- Let it sit at room temperature (ideally between 68°F and 78°F or 20°C and 26°C) for 24 to 48 hours. The longer it ferments, the tangier it will become.
- Check Consistency:
- After fermentation, check the consistency and flavor. It should be slightly thickened and have a tangy taste. If it’s too thick, you can stir in a little more plant-based milk to reach your desired consistency.
- Strain (if using kefir grains):
- If you used kefir grains, strain them out using a fine mesh strainer or cheesecloth. You can reuse the grains for your next batch of kefir.
- Store:
- Transfer your vegan kefir into an airtight container and refrigerate. It will keep for about 1 week.
- Serve:
- Enjoy your homemade vegan kefir plain or blend it with fruits for smoothies!
Tips
- Flavor Variations: You can add vanilla extract, sweeteners like maple syrup, or fruits like berries after fermentation for added flavor.
- Thicker Kefir: For a creamier texture, consider blending in soaked cashews or using a thicker plant-based yogurt as a base.
- Experiment with Different Milks: Feel free to try different types of plant-based milks to find your favorite flavor and consistency.
Differences Between Soy Milk and Cashew Milk for Making Vegan Kefir
- Texture: Soy milk is creamier and thicker than cashew milk, which can result in a richer kefir. Cashew milk is usually lighter and may produce a thinner consistency.
- Protein Content: Soy milk has a higher protein content compared to cashew milk, which can contribute to a more robust fermentation process.
- Flavor: Soy milk has a more pronounced bean flavor that may affect the taste of the kefir, while cashew milk has a subtle, nutty flavor that is generally milder and creamier.
- Nutritional Profile: Soy milk is often fortified with vitamins and minerals, while cashew milk may contain fewer nutrients unless fortified.
Ensuring Your Vegan Kefir is Creamy and Not Too Tangy
- Fermentation Time: Reduce the fermentation time to prevent excessive tanginess. Taste your kefir after 12 hours and refrigerate it once it reaches your desired flavor.
- Milk Selection: Use creamier plant-based milks like soy or full-fat coconut milk to achieve a richer texture.
- Temperature Control: Ferment at slightly cooler temperatures (around 68°F/20°C) to slow down the fermentation process, resulting in less tanginess.
- Sweeteners: Adding a small amount of sweetener (like maple syrup or agave) can help balance the tangy flavor.
Using Coconut Milk for Making Vegan Kefir
Yes, you can use coconut milk for making vegan kefir. It provides a rich and creamy base that ferments well with probiotic cultures. Here’s a simple method:
- Shake or stir well to combine the cream and liquid of canned coconut milk.
- Mix with probiotic cultures (either grains or starter culture) and let it ferment at room temperature for 24-48 hours until thickened.
Best Toppings for a Vegan Kefir Smoothie
- Fresh Fruits: Berries, bananas, mangoes, or peaches add natural sweetness and flavor.
- Nuts and Seeds: Almonds, walnuts, chia seeds, or flaxseeds provide crunch and healthy fats.
- Granola: A sprinkle of granola adds texture and additional nutrients.
- Nut Butters: Almond butter or peanut butter enhances creaminess and adds protein.
- Coconut Flakes: Unsweetened coconut flakes add flavor and texture.
Storing Homemade Vegan Kefir to Keep It Fresh
- Refrigeration: Store your homemade vegan kefir in an airtight container in the refrigerator to keep it fresh for up to 5-7 days.
- Separation: It’s normal for kefir to separate; simply shake or stir before consuming.
- Use as Starter Culture: Reserve some of your homemade kefir (about ¼ cup) to use as a starter for your next batch.
- Avoid Contamination: Use clean utensils when handling kefir to prevent introducing unwanted bacteria.
These tips will ensure that your homemade vegan kefir turns out perfectly creamy and packed with flavor! This nutritious kefir isn’t just a great drink on its own; it’s also a versatile addition to smoothies, breakfast bowls, and recipes that need a probiotic boost. Enjoy the wholesome goodness in every sip!

